Time needed: 2 hours.
Did you know that many people who get their medical cards are also allowed to grow at home? If the state has legalized home-growing for patients, it is a great way to save money.
- What Are Space Buckets?
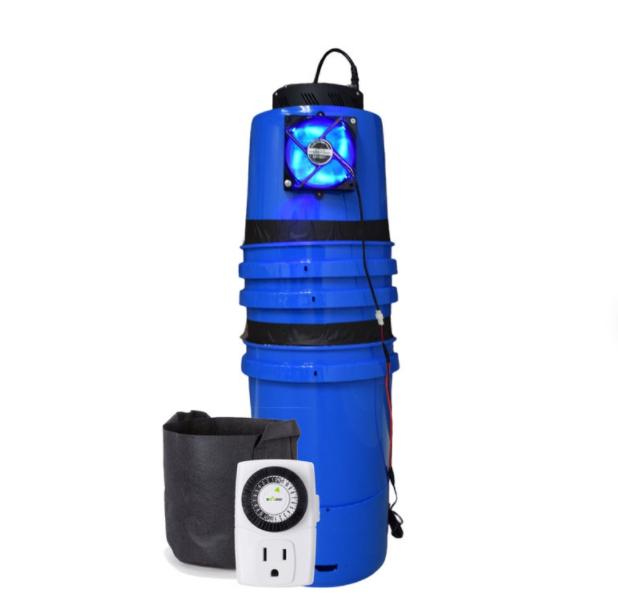
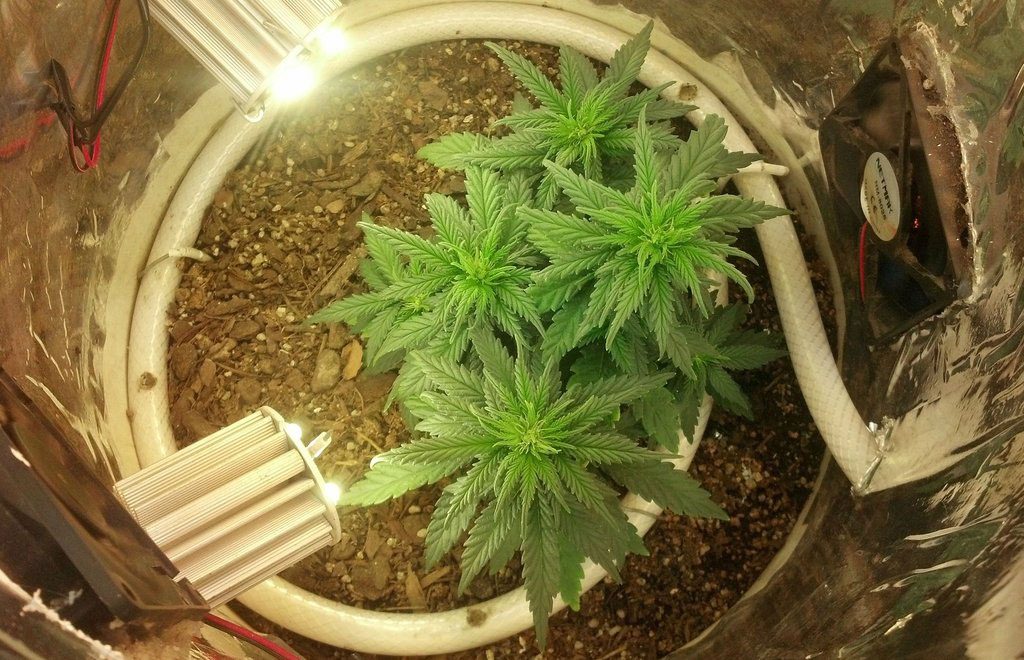
The solution to growing cannabis at home for medical cardholders that don’t have the room for a big set-up. Stack the buckets up and create the ideal environment to grow medicinal cannabis at home successfully. Also, the light used inside them is called a UFO. It is a type of LED light for cultivation. So maybe space aliens are involved.
- How Much Do Space Buckets Cost?
It depends on the size. A quick look online and you can find complete space bucket kits starting from $100 for a 6-gallon set-up. Multiple bucket kits start around $300.
- What Makes a Space Bucket Different Than Growing Cannabis in a Regular Bucket?
The structure of a space bucket optimizes temperature and soil conditions to allow cannabis plants to thrive. The average yield per plant using a space bucket is 1-2 ounces per plant. One of the design benefits is that it helps keep the lamp from damaging the cola as the plant grows. And it can be easily extended in height by adding more vertical buckets.
After Canada was federally legalized, I had the opportunity to tour a set-up in a friend’s home basement. The Cannabis Act in Canada (federally legalized) allows for a total of four plants per household. In some legalized states in America, the plant limit is assigned per person living within the home. Adults with medical cards.
What I saw in her basement was kind of a mess. She had watched some YouTube videos on home cultivation and bought a version of “Growing Weed for Dummies” with step-by-step instructions.
I decided I was never going to try to home-grow. It looked too complicated compared to visiting a local dispensary. But for many patients who don’t have a black thumb and who live far away from a dispensary, it’s appealing.
Except for that cost and complication of set-up and the equipment, you need to do it. If you have been researching how to home-grow efficiently, you may have heard about Space Buckets. It is a new and very economical way to cultivate cannabis plants at home. And even if you have a ‘black thumb’ a Space Bucket will help you get better results.
What Do Cannabis Plants Need to Grow?
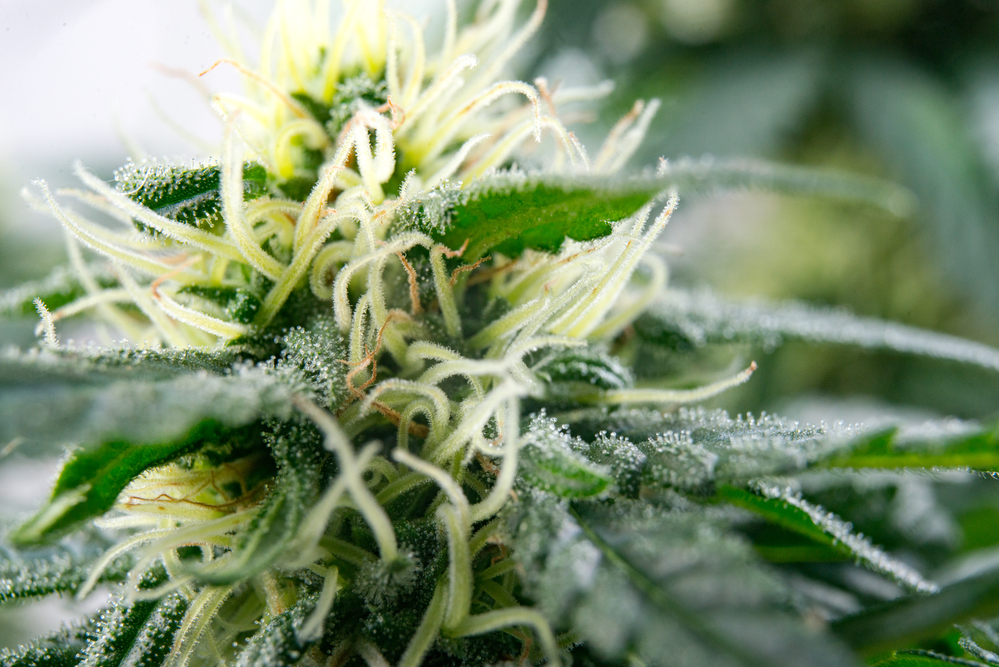
Unlike a medical cannabis cultivator with huge greenhouses and state of the art technology, home-growing can be a lot less complicated. And not nearly as expensive. There are a few basic things that the hardy cannabis plant needs to thrive. Don’t let the ‘weed’ moniker fool you. Cannabis is a picky plant that can take time to master in terms of cultivation.
First, let’s talk about the humidity. That is where most novice growers have a real problem. Humans sweat, but plants transpire water and nutrients at higher temperatures. And with an increased humid environment comes issues like black mold, mildew, and even bugs. The ideal range of humidity for cannabis plants to thrive is between 40% to 50%. At that level, cannabis plants can resist or fight off mold, mildew, and other threats.
Overwatering cannabis plants is one of the mistakes that most first-time growers make. It’s an act of love; you don’t want your plant to dry out. But some of the signs of overwatering include spots on the leaves, browning of leaves, drooping, and lack of oxygen in the plant’s root structure. Overwatering can also be confused with light or lamp stress, which creates the same spotting on leaves.
What Are the Benefits of Using Space Buckets to Grow Cannabis at Home?
Are they called a ‘space bucket’ because they resemble something extraterrestrial? Not really. The term ‘space bucket’ is a nod to the low space requirement that is needed. If you own your own home, you may have a basement or a room in your garage that you can dedicate to growing. But what if you live in an apartment or a small condo?
If you live in a small dwelling with a balcony, you may think it is the perfect place to grow outdoors. The problem is that most states that have legalized home-growing for medical cardholders have an important legal restriction. Your cannabis plants cannot be in a place that is not protected or secure against theft (or access by minors). And you cannot grow cannabis where it is visible to the public.
That knocks the balcony idea out of contention. The space bucket, however, can fit neatly into a corner. You can also convert a small closet into your official ‘grow room’ by installing some space buckets. Don’t worry about the floor. Space buckets are designed to catch and recycle water.
Climate control is critical to producing cannabis. It is a highly evolved plant, and it prefers a subtropical environment. That may be easier to do with an outdoor greenhouse in the summer months. But if you live in a cold or temperate climate, you need to control conditions like heat and humidity for your seedlings. The space bucket gives you precise environmental control.
To Buy or to Build Your Space Buckets? That is the Question
Many people have assembled their DIY (do-it-yourself) space bucket at home for less than $100. The technology behind the design of a space bucket is pretty rudimentary. Anyone can build one. It just depends on how eager you are to get all the supplies together and assemble them.
How much time do you have? That’s the best place to start when figuring out the build-it or buy it a question. Shop online and check out some of the pre-made and ready-to-assemble kits. They are a little more money than building one for yourself. However, they can be assembled in less than thirty minutes. And no driving to the hardware store is required.
One of the benefits of making your space bucket is that you can create more than one once you have mastered the technique. So, you will save money. Another advantage of assembling your space bucket and understanding how it works? You will be able to repair and replace parts like a pro—no need to buy a new set-up when you can fix it yourself.
How-To “Get Growing” Cannabis With Space Buckets
We’re going to assume that you decided to be less of a weekend warrior do-it-yourself person and opted to buy a kit. Now, you have a giant box of parts and stuff in your living room. How do you start growing cannabis at home with a space bucket?
Everyone wants to ‘get growing’ right away. Here are seven important steps to set-up your first space bucket and start your home-grow.
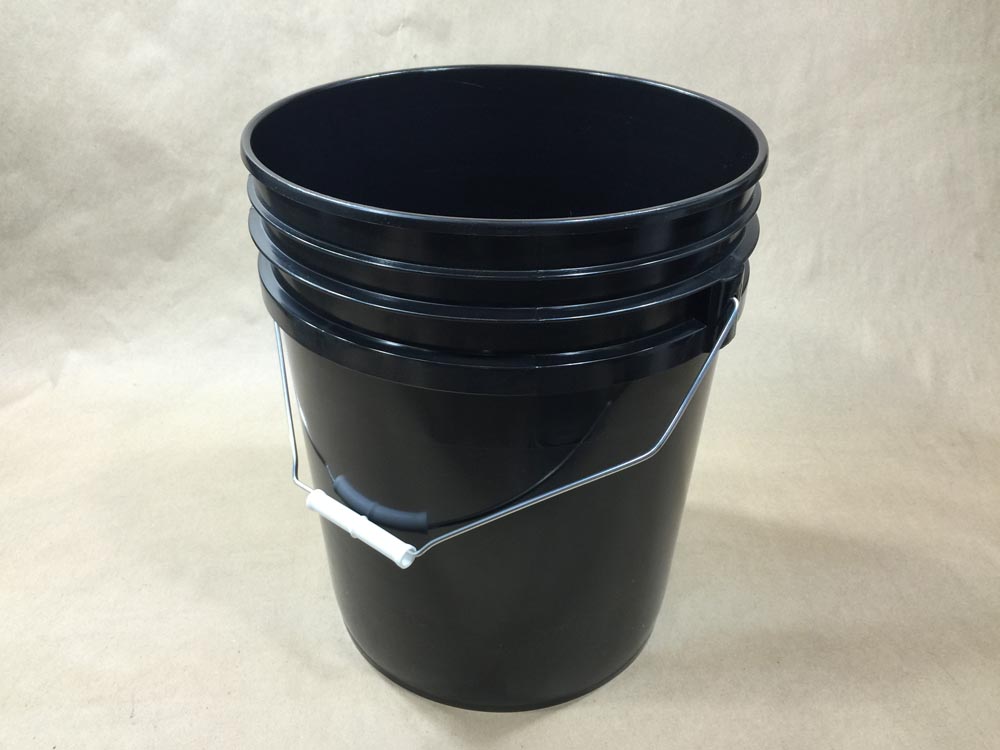
1. Grab a Few Black Five Gallon Buckets
Can you use a smaller one? Sure. But if you want to grow a robust cannabis plant with a high yield of bud, you will want to have a healthy, stocky plant—one with room to develop a healthy root system. A smaller bucket means a smaller yield.
Start with four or five buckets. The black five-gallon buckets are a little more expensive at your local Big Box or hardware store. They are worth it, though. The black buckets help reduce light leaks. It keeps more of your grow light inside the space bucket and helps the cannabis grow better.
2. Remove the Bucket Handles and Drill The Drainage Holes
This part is straightforward. Since you will stack the buckets to allow for a tall vertical grow space, you don’t need the handles. They will just get in the way, so remove them before you get started.
Next, you will need to drill aeration and drainage holes in all your buckets. Set one bucket aside, and this is your base bucket. Drill some holes through the bottom of the bucket to allow the soil to get oxygenated and drain excess water.
3. Cut Your Extension Rings
It probably won’t be long until we start seeing very tall buckets at Home Depot or Lowes. They will probably discreetly label them “vertical grow buckets.” For … tomatoes. In the meantime, you will have to make your extensions to get the height you need for a healthy plant.
Got power tools? Then you can use a saw to cut out the top rings of each pail. You will be using the top five or six inches or the lip of the pail as your extensions. No power tools? No problem! Get a hacksaw. And maybe a chair because this part can take about thirty minutes. But remember, it “counts as gym.”
4. Stack and Secure Your Extension Brackets to Your Base Bucket
This is the easy part. Simply grab your newly cut extension pieces and stack them up on top of your base bucket. Since you are using the same style and size of the bucket, they will fit together like building blocks. Some people like to use duct tape to seal the seams between each extension. It helps to retain the grow light and also the humidity.
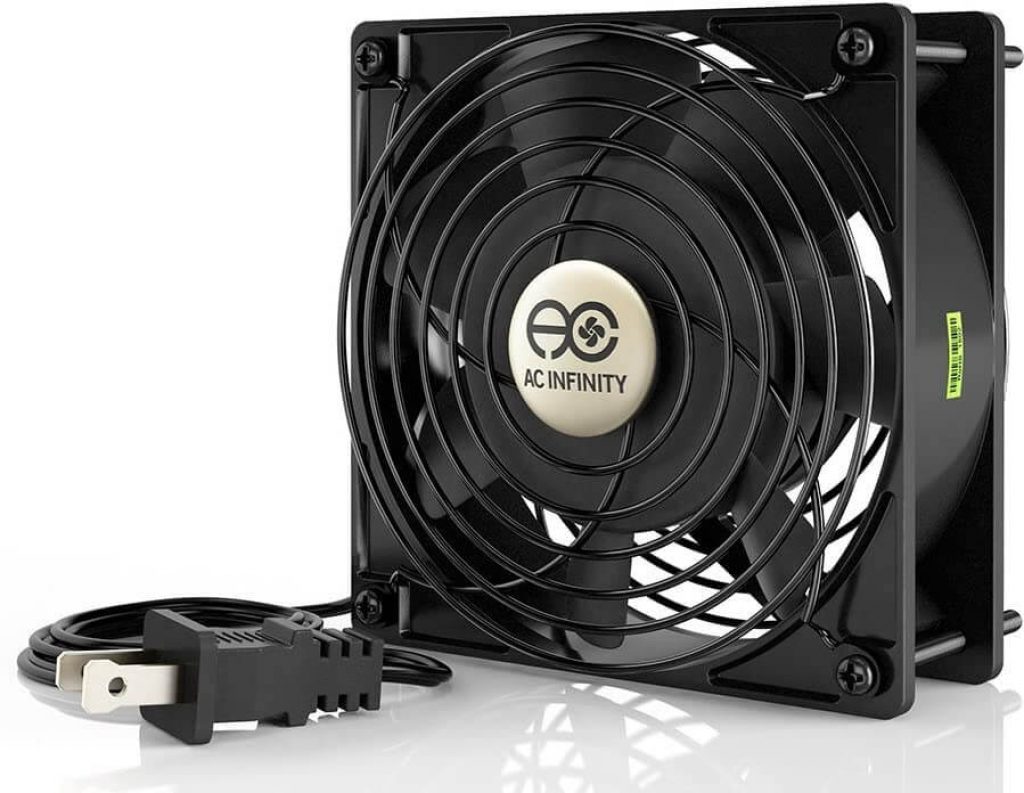
5. Install Your Intake and Exhaust Fans
Don’t panic! It’s not as hard as it sounds. Basically, you will need two types of fans installed in your vertical space bucket. One that will intake oxygen for the plant and the other will function as an exhaust to help control heat and humidity.
Five-inch fans are a popular choice. But you will want one fan to be larger than the other. So, you may choose a four-inch fan for your exhaust and a five-inch fan for your intake. They may also be called ‘metal muffin fans’ by some manufacturers if you are looking to buy them online.
The fans for space buckets are not hard to install. Some people like to install a carbon or black filter to help reduce the smell of the soil and cannabis. Particularly helpful if you are using your closet to set up your space bucket and don’t want your clothes smelling like weed.
This part will need some power tools. So, buy them or borrow them, and get hole saws that match the dimensions of your fans. Drill the holes for each fan. Install your exhaust fan at the top of your space bucket (the larger fan). Install the intake fan at the bottom of your space bucket. You can seal around the fans with indoor silicone caulking or duct tape.
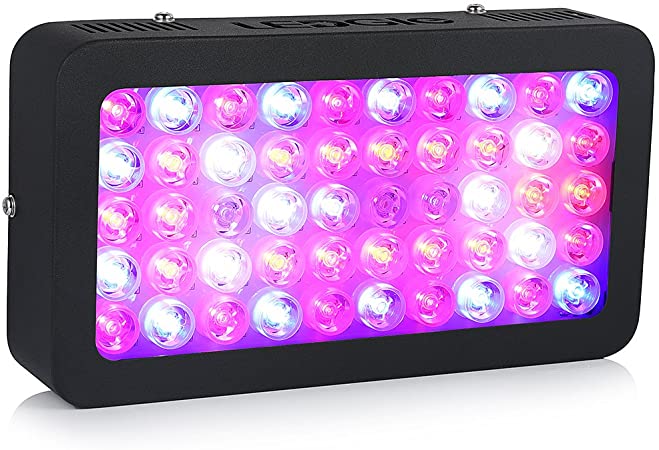
6. Install Your Grow Lighting
There are a lot of different options you can choose for lighting inside your space bucket. You can choose from a variety of types of grow lights, including:
- CFL’s
- COB’s
- LED Strips
- Standard (old school) grow lights
You will want between 90 to 100 watts of power through your wall and into your grow box in terms of strength. Waterproof grow lights are getting easier to find, and they tend to last longer in the humid environment. They are a little bit more expensive, but worth it durability wise.
Make sure that the grow light you purchase fits within the dimensions of the lid of your space bucket. Measure and cut a bucket lid and secure the lighting so that it is partially recessed. Lights also have fans, and you will want the light fan to be outside of the bucket. This helps protect your plant and prevent overheating.
Run the wires down your vertical bucket. You may want to duct tape them to the bucket to keep them fastened securely. Then plug in your fans and your light source into a power strip and give it a test run. If the fans and lights are working, you are almost done.
Insert a waterproof thermometer midway down the inside of your bucket. Leave it alone for an hour and take a reading to determine if you need another intake fan to regulate temperature. It all depends on the strength of your grow lights.
7. Light Proofing and Sealing Your Space Buckets for Moisture Loss
Your space bucket has to be completely sealed to retain all the light. If there are cracks between every vertical extension, that means your grow environment will be compromised. You will lose the subtropical temperatures and humidity you will need to grow a healthy plant.
Duct tape! Again? Yep. Or electrical tape is a fast and economical way to seal all the seams of your space bucket. Next, you will have to decide if you want to paint the inside of the bucket or line it with foil tape or strips. The idea is to create a reflective interior to help maximize the dispersion of the grow light. You want the light to reach all areas of the plant (not just the top leaves).
Some people swear by foil. Your average run of the mill tin foil that you have in your kitchen can work. If you have heavy-duty tin foil, you can triple fold it and install it on the inside of your bucket. Foils are ‘specular’ reflectors—science for a mirror-like reflection of waves. Use spray glue or double-sided tape to fasten the reflective foil on the bucket’s interior and lid.
Other people say that foil is not the best reflector to use. And they prefer to use mylar (aluminum on polyester coating) and keep the inside of their bucket a reflective white color. Mylar can be painted but may take multiple coats.
8. Get and Install a Self-Watering System
There are many options to choose from. You want a watering system that will detect the dryness level in the soil and then automatically water. Not only is it convenient and time-saving for you, but it will balance moisture levels properly.
You can go high-tech and expensive or low-tech. There are programmable pumps like this one on Amazon that are easy to set up. You insert the intake tube into a water reservoir (or container). The second tube goes into the space bucket, ideally about two inches above the soil line.
You can program when and how much its waters, and you can get expansion packs to have one pump for all your plants. Some of the programmable pumps are so sophisticated that they have an alarm to let you know when the water reservoir is dry.
Old school or gravity fed self-watering systems are maybe less fun, but also less expensive and equally effective. The models look more like a vertical reservoir or small tank, with a spout at the bottom. Usually, the spout is made out of clay and inserted into the soil. When the spout is dry, it allows water to flow by using gravity and flood the soil. If the spout is wet, it does not allow water through.
There is gravity operated watering stakes. They are similar in design, but instead of a spout, it will have tubes that run to stakes-placed evenly in the soil of your space buckets.
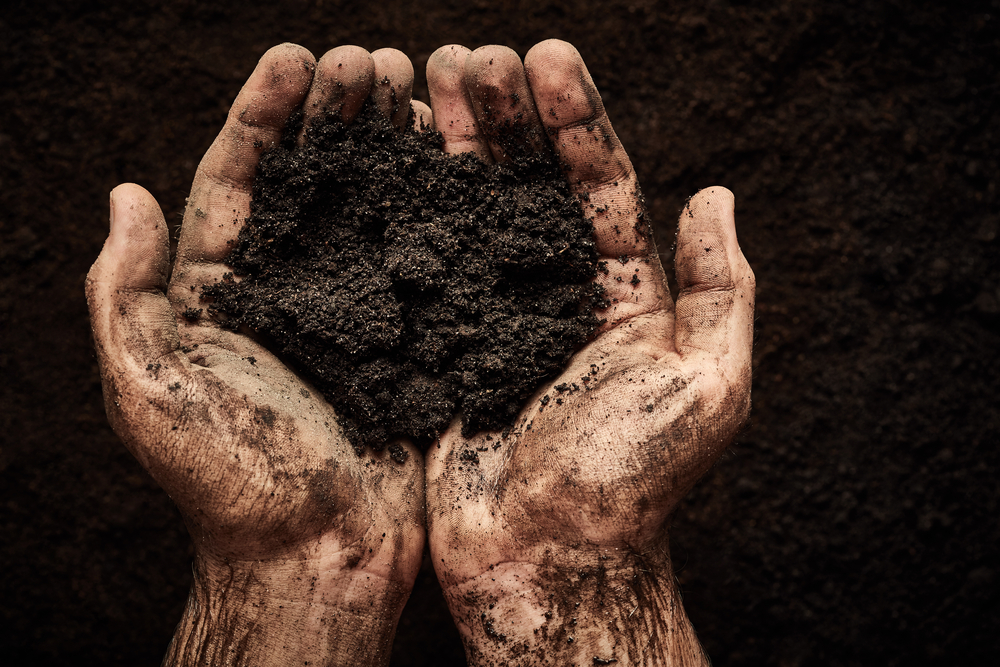
9. Take Time to Choose a High-Quality Soil for Your Space Buckets
The soil mixture perfect for growing cannabis is hotly debated. But an organic compost soil that has all the nutrients for potted plants is a perfect choice. You may want to augment your soil by adding some worm castings. That is the dark black and rich soil that plants love because of the natural fertilizers.
Don’t go cheap on the soil for your space buckets because it is one of your most important elements. High-quality loam soil is the best way to go. It has an almost neutral pH (acidity level) and has good water retention and drainage properties. That is thanks to the mix of sand and clay with the soil.
Loam soil is a good quality if you can grab a handful and make a loose ball with it before it breaks apart again. It is not sticky but moist. And it smells repugnant. Not bad, but if the soil is very fertile, it will smell ‘alive’ or like moss in a forest. And it also contains valuable microorganisms that help create healthy roots for your cannabis plant.

10. Plant Your Cannabis
When you want to grow your cannabis, you have two choices. You can either start with seeds (which are easier to find and buy) or clone seedlings. Clones are harder to find, but as more states are legalizing home-grow for medical cardholders, it is getting a little easier to find them.
Companies like the Seed Bank allow patients to verify their medical status and order online. There are companies in every legalized state, however, that provide the same services. One of the benefits of taking the extra step and getting clones is quality. You may be accessing award-winning strains that are not available in seed form.
Quality control is a big factor to consider. When you are ordering clones from an established cultivator, you have the information you need regarding your cannabis. Because they produce clones under strict regulations, you can guarantee that the THC level of your cannabis will be ‘as advertised.’ This is a good thing, as many states have restrictions on THC’s maximum level for home-grown cannabis.
A Quick Hack to Professionally Manage Humidity for Your Space Bucket
Humidity can be a problem, depending on where you live. And cannabis plants need relative humidity to mimic subtropical conditions in order to thrive. So, you will need a little bit of magic to create that for your plants at home.
Every space bucket has an intake fan for oxygen. A simple and economical way to adjust humidity is to place a humidifier near the intake fan. Easy, right? Then just fill your humidifier and monitor water levels. Keep it running beside your space bucket, and you’ll create the perfect moisture conditions for growing.
Some people use distilled water or spring water inside the space buckets and to fill the humidifier. The reason is that chlorine and other chemicals can be present in tap water. That can inhibit the growth of your plants. And in some cases, create chemical burns to your leaves. Chlorine deposited through moisture droplets can also make your soil acidic.
How Many Cannabis Plants Can I Grow At Home With Space Buckets?
Let’s say you become proficient at growing cannabis at home. Practice makes perfect! You may be tempted to grow more plants. And here is where we have a warning for patients; know your legal limits and stay within it.
In states that have legalized medical cannabis and permitted patients to grow at home, there are always stipulations. How many plants can you grow? How many seedlings versus mature plants are allowed? And where are you allowed to grow cannabis at home?
It all depends on what your state of residency has allowed. If you are not sure, visit the website of the medical cannabis program for your website. They will have a list of the legal vs. illegal when it comes to home-growing for medical cardholders.
If growing at home for medical purposes and cardholders are legalized, you shouldn’t hesitate to contact your state program for information. Each state that has legalized home growing wants patients to utilize the privilege under legal protection. Get the facts straight about what you can and can’t do with your cannabis plants to avoid legal problems.
Double-check the number of seedlings versus mature plants you are permitted to have. If you are growing more than the legal limit, you would be facing some serious legal trouble. Producing more than the number of plants allowed may also result in a charge of commercial unlicensed cultivation or distribution. That can be a misdemeanor or a felony charge (depending on the number of plants).
How to Avoid Breaking the Law in Your State With Home-Grown Cannabis
One of the consistent legal restrictions in all states that permit home-growing is location. Medical cardholders can cultivate safely and under legal protection as long as they follow their state’s safety and access laws.
Before you set up your space buckets, be aware that some of the restrictions may include:
- No public visibility. You can’t grow cannabis on your front lawn where every kid in the neighborhood can see it. Or sample it. It’s still a controlled substance, and lawmakers are very committed to making sure it is discreetly kept out of the sight of minors.
- Outdoor access must be secure. Let’s say you build a small greenhouse in the backyard and have made it private. Will your crop be secure against someone opening the greenhouse for illegal access to your medical cannabis? Lock it up and lock it down (and of course, don’t tell everyone you are growing for personal use). Keep it private to avoid problems or break-ins because someone will trespass for free weed. And depending on the laws of your state, you may have civil liability for intoxication and injury as well.
Other things you can and cannot do with your home-grown cannabis? Sell it. That’s right. To a family member or friend, or neighbor. Even to someone else you know who has a medical condition and a medical card. If you sell your cannabis to someone else, you are growing for distribution and trafficking. And that can land you in some legal hot water.